Slipcovers From Dropcloths

For the most part the chair and ottoman slipcovers are finished. I noticed this morning that I want to do a little adjustment on the ottoman corners and I want to add a ribbon to the back of the chair due to the fabric not being as form fitting as I had liked.
chaircover 080

For starters of course you need to find the dropcloths. I ended up ordering mine from Amazon. Great price and free shipping! There was a difference in the type of fabric from the dropcloths I had used for the draperies. At first I was dismayed, but after working with the fabric and a little more thought I am glad the fabric is different. Why? This fabric has a little bit of a nubby texture to it which I love. Also, I’m really glad it is not all matchy matchy. Here is a photo of the different types of dropcloth fabric. The one on the right is the drapery fabric. It really is a personal preference.
chaircover 085

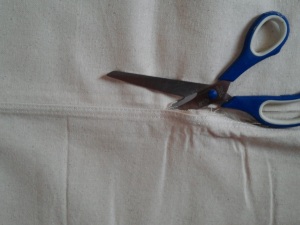
I cut the dropcloths along the finished seams. Some people use these seams, I prefer not to, they seem a little clunky to me.
chaircover 082

Cutting them makes them more manageable and an easy fit into a home washer and dryer versus taking them to a laundromat. I bleached the pieces with 2 cups of bleach per washload. Two reasons. First, I didn’t care for the amout of the unbleached look that they had, and secondly, at some point they will need to be cleaned. By starting them off washed and bleached I know how the fabric will look with a good cleaning. Also, I washed them in hot water and dried them in a dryer to shrink them to a true size.
chaircover 088
I wanted the chaircover to have a more relaxed fir, therefore, the only measuring I did was for the skirt. I have made slipcovers twice before and this technique has served me well. I layed a large section of fabric over the chair and cut it to fit, starting with the back. Then I moved on to the arms of the chair.
chaircover 091
I played with the fabric a bit. I wasn’t quite sure how I wanted to handle the arms of the chair. I wanted a soft look. I ended up simply gathering the excess fabric together and tucking it behind a front panel. I love the finished look.
chaircover 092
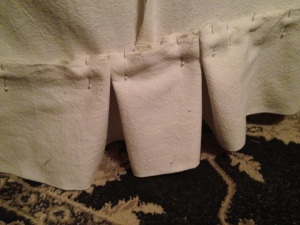
Next came the skirt of the chair. I measured all around and added an extra 5 inches for every box pleat that I wanted. I ended up with one at each front corner and two hugging the back corners, pinning and fitting as I went along.
chaircover 095
chaircover 096
Here’s a tip……if you pin the pieces together while they are on the chair, remove the cover, sew the seams, press and turn the piece, you can then easily place it back on the chair.
Here is the completed chair. (or almost. Like I said earlier I decided this morning that it needs a ribbon tie back for the back of the chair.)
chaircover 109
Oops! Here is a before photo:
chaircover 087

Ornaments and Trimming Beards

So what do ornaments and trimming beards have in common? Well, the main thing is that they are items that I am creating for a Holiday Market in Naperville put on by Room 363. Indeed it is that time of year. And, shamefully, I am one of the few people glad to see the Christmas items on display in stores. Terrible, right? You see that preparing for a holiday show does not happen overnight. And I had a few ideas in mind but it involved using some Christmas themed items that were not readily available. For instance there is a certain color green tissue paper that I wanted to use for ornaments. I looked everywhere I could think of that sold giftwrapping. Then about the time I was about to forget that particular color I went into JoAnne Fabrics. They had put out a fair amount of Christmas decor and lo and behold there was just what I was looking for! With a sigh of relief I knew then that I would indeed be able to complete what I had just begun, and with time to spare.

elveschuckstephencharlie 003

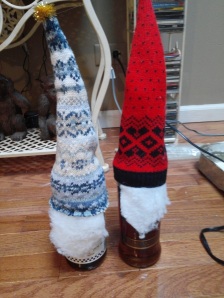
The elves are what I call Wine Elves. They are a nice little touch when taking a gift of wine for the hostess of the get together that you are going to for the holidays. It just slips onto the top of the bottle. Dresses it up a little doesn’t it?

craftitems 021

I really enjoyed working on the ornaments. I’m including some photos of them during the process. Easy enough to do, although a little messy with the glitter and all.

craftitems 015

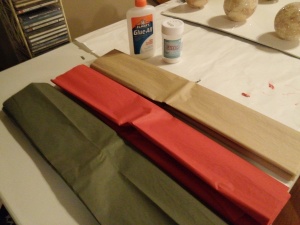
Using styrofoam balls (I used the larger ones), loosen up Elmer’s glue with a little water and “glue” on about 3″ torn sheets of a tissue paper that you want to use. I used 3 colors.

craftitems 014

craftitems 016

Let dry. A good way to do this is to poke screws through foamcore and then press the balls onto the screws like in the photos.

When dry brush on a thin coat of the glue mixture and then sprinkle with crystal glitter. Let dry again. This is the messy part…..I try to brush off as much loose glitter as possible at this point.

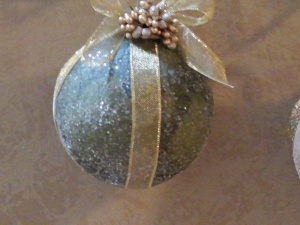
Using about a 5/8 ribbon wrap it around the ornament twice and tie a standard bow. (This can be a little tricky depending on the ribbon you used.) Next I hot glued some little gold berries to the top. You could use acorns for a nature feeel.
craftitems 017

Voila!
craftitems 011

craftitems 012
craftitems 013

Like I said, it is a little messy, but this could make a nice little gift couldn’t it? Or maybe you would just like it to dress up your own tree.

Enjoy your day! ( I’ve been battling a really bad cold this week and looking for some relief!)
Doris

Gold Leafing

Hello there!

I thought I would give a lesson in gold leafing. This is something that can have spectacular results, and, surprisingly, is not that difficult to do. It can be a little messy but in a good way. I’ll explain that later.

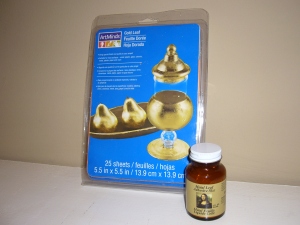
The materials that you will need are an older paint brush (you will end up throwing this one away) or purchase a small spongebrush. You will also need sizing adhesive and the gold leaf itself. This is a synthetic gold leaf, which is more common and alot less costly. I would suggest you find a piece to work on on the smaller rather than larger side. When you are comfortable with that you can move onward to something larger. Maybe you would like to practice on a foamcore board as I am showing here. Or have you been wanting to jazz up a frame? That is a good project with easy results.

You also will need paint in a color that you would like to have show through in areas. Black and red are the most common, but any color will work. Don’t go to any great expense with this for starters. A small bottle of acrylic craft paint will do just fine. I am using black.
Basecoat the piece or sample with 2 coats of the craft paint. When thoroughly dry, using your old brush, apply the sizing adhesive. it will be white in color but dries clear. I will tell you that when it dries it is quite sticky, so beware.

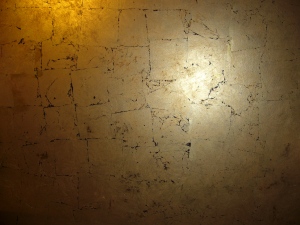
After your adhesive has become clear, you are ready to start the fun. The gold leafing comes in 4″x4″ sheets. Remove one and apply it to the adhesive. Here I have kept them in a straight order but you may choose to angle them or tear them into pieces. Now, this is where the little messy part starts. the sheets of gold leaaf are quite thin and fragile. When clients have asked about it I tell them to think of butterfly wings and you almost have the delicacy of gold leaf. It will tend to float around in pieces if allowed to. The sheets will invariably tear somewhat, don’t worry about that. If you notice in the one photo you can see straight lines of black showing through. In the next photo not so much. That is because I went back in with the broken pieces and filled in some of the area. I like to leave small background areas to show through. it breaks up the straight lines and also can give it more character, I think. A good thing to use to help put it down is a small brush. Here I have used a mop brush, but an inexpensive chipwood brush will work just fine. After you have applied as much gold leafing as you want you will need to burnish it. All that is is taking a rag (old tshirt is good, or soft paper towel, or even kleenex), bunch it up a little , and rub the surface, ideally in circular motions. You will be able to see the difference even though it is subtle.
Here are photos to get an idea of what the process would look like, and then I added an elaborate vestibule ceiling that I completed.
P1010692,P1010694
P1010695
P1010697
P1010698
KCB vestibule,scrolls 001
KCB vestibule,scrolls 002

Behold! Your own gold leafing!

In a few weeks I will be using gold leaf in another project that is for Easter. I think that you will like it!